
Getting Started with Workspaces
Static.app provides powerful tools for organizing your projects and collaborating with others through Workspaces. Workspaces allow you to separate different projects, clients, or business units into distinct environments.
The Default Workspace
By default, every Static.app account starts with a single, primary workspace. However, creating separate workspaces is highly recommended to better organize your websites and isolate billing or team access.
How to Access and Switch Workspaces
- Log in to your Static.app dashboard.
- At the top of your dashboard, click the workspace dropdown menu. Your currently active workspace will be marked with a checkmark.
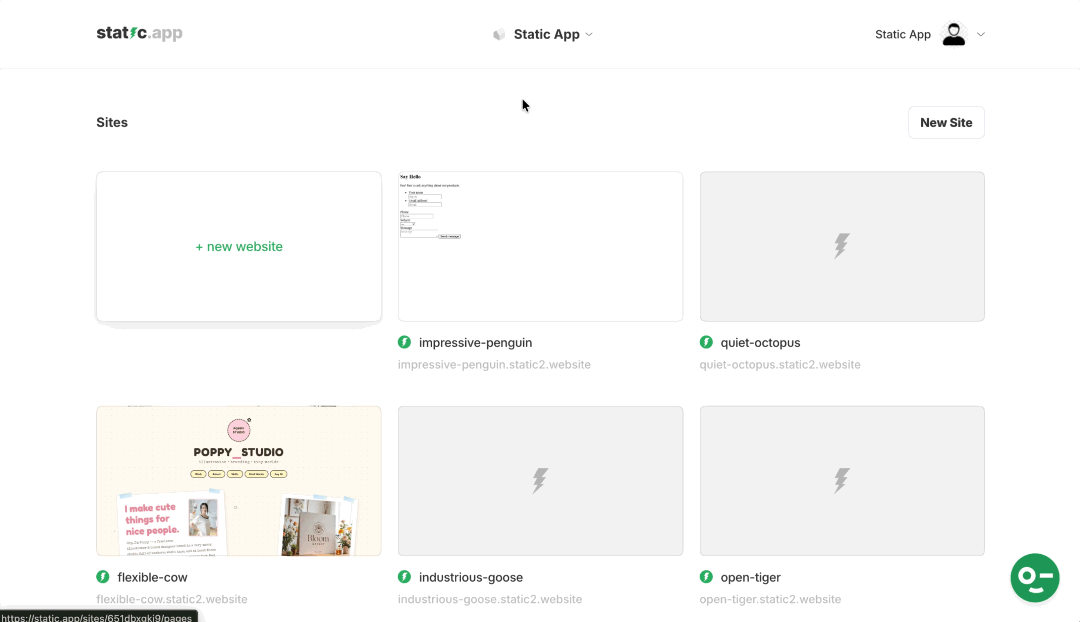
- Click on your desired workspace name to switch to it. If you are on the Sites page, switching workspaces will automatically refresh the view to display only the websites associated with your newly selected workspace.
- To view or edit your workspace settings, click the Manage workspaces option from the dropdown menu.
- You will be redirected to the Workspaces page within your Account section.
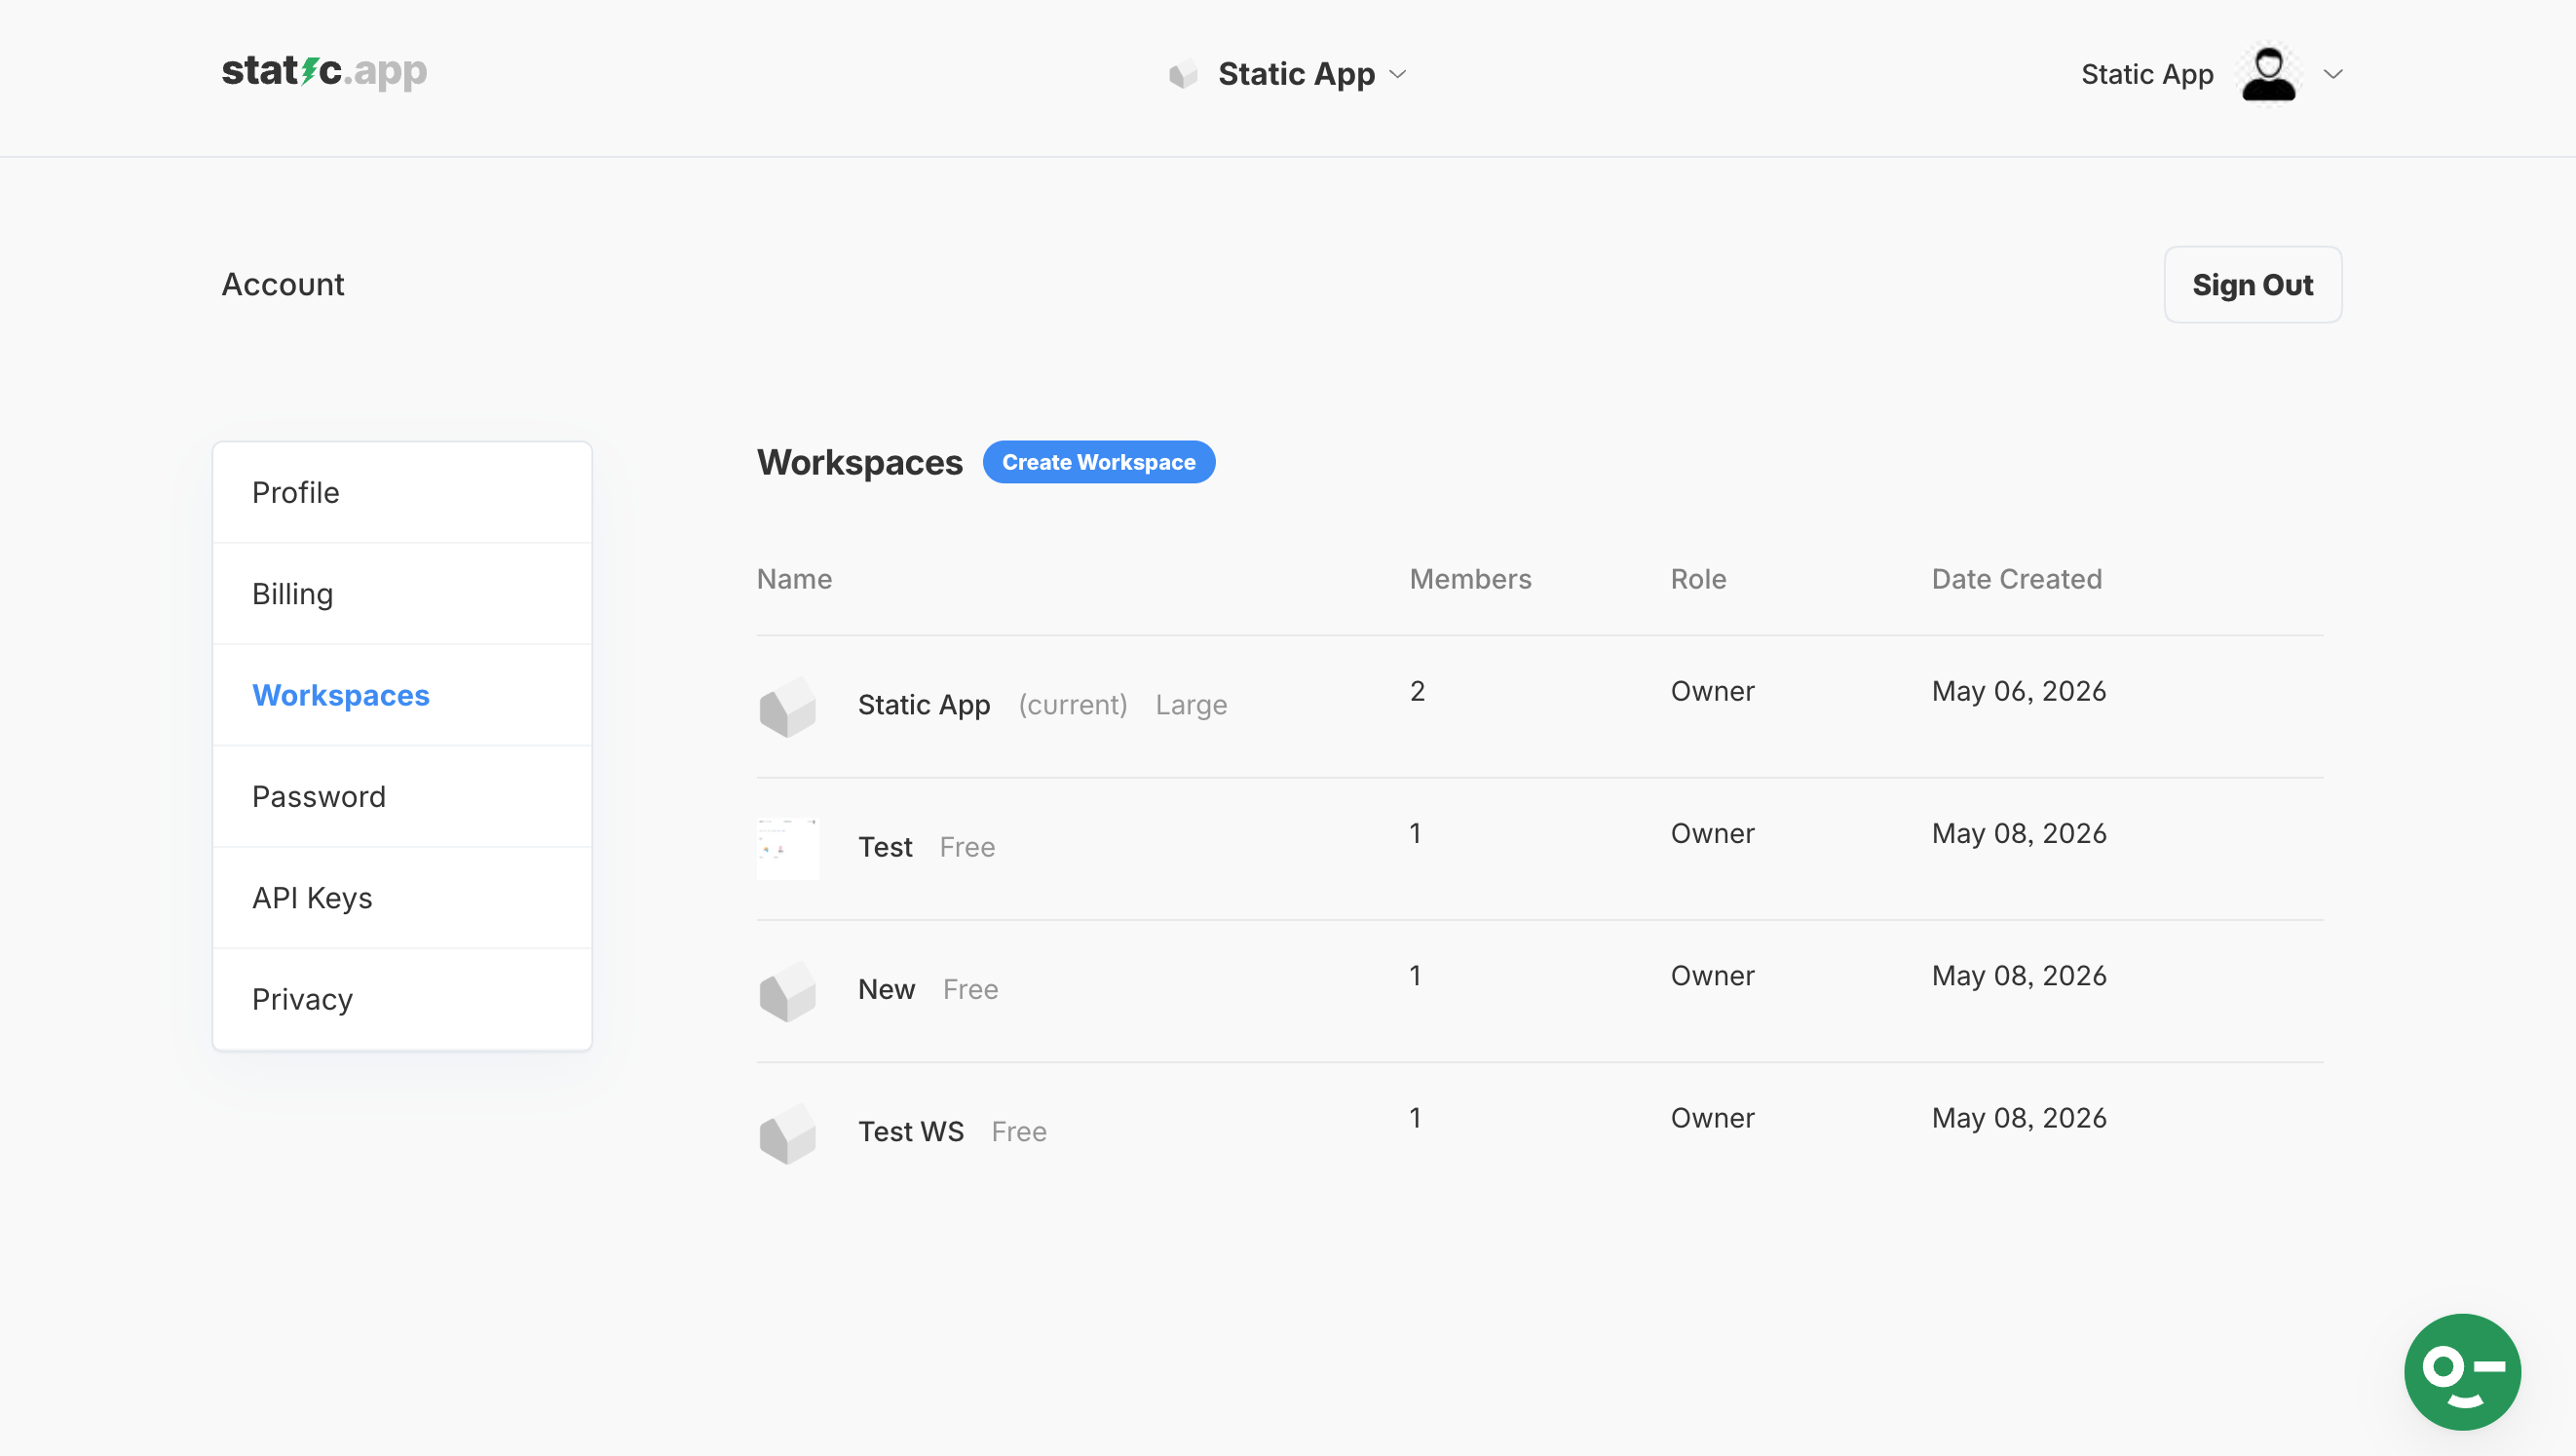
The Workspaces Dashboard
On the Workspaces page, you'll see a table listing all the workspaces associated with your account. The table provides key details for each:
- Name: The name of the workspace (e.g., "Test", "Marketing Team"). It also indicates your current active workspace and its plan tier (e.g., "Free", "Large").
- Members: The total number of team members in that workspace.
- Role: Your role within that workspace (e.g., "Owner" or "Developer").
- Date Created: When the workspace was established.
How to Create a New Workspace
Creating a new workspace is simple and allows you to start a fresh environment for new projects.
- Navigate to the Workspaces page as described above.
- Click the Create Workspace button.
- Enter a Name for your new workspace.
-
Click Create Workspace button to finalize the setup.

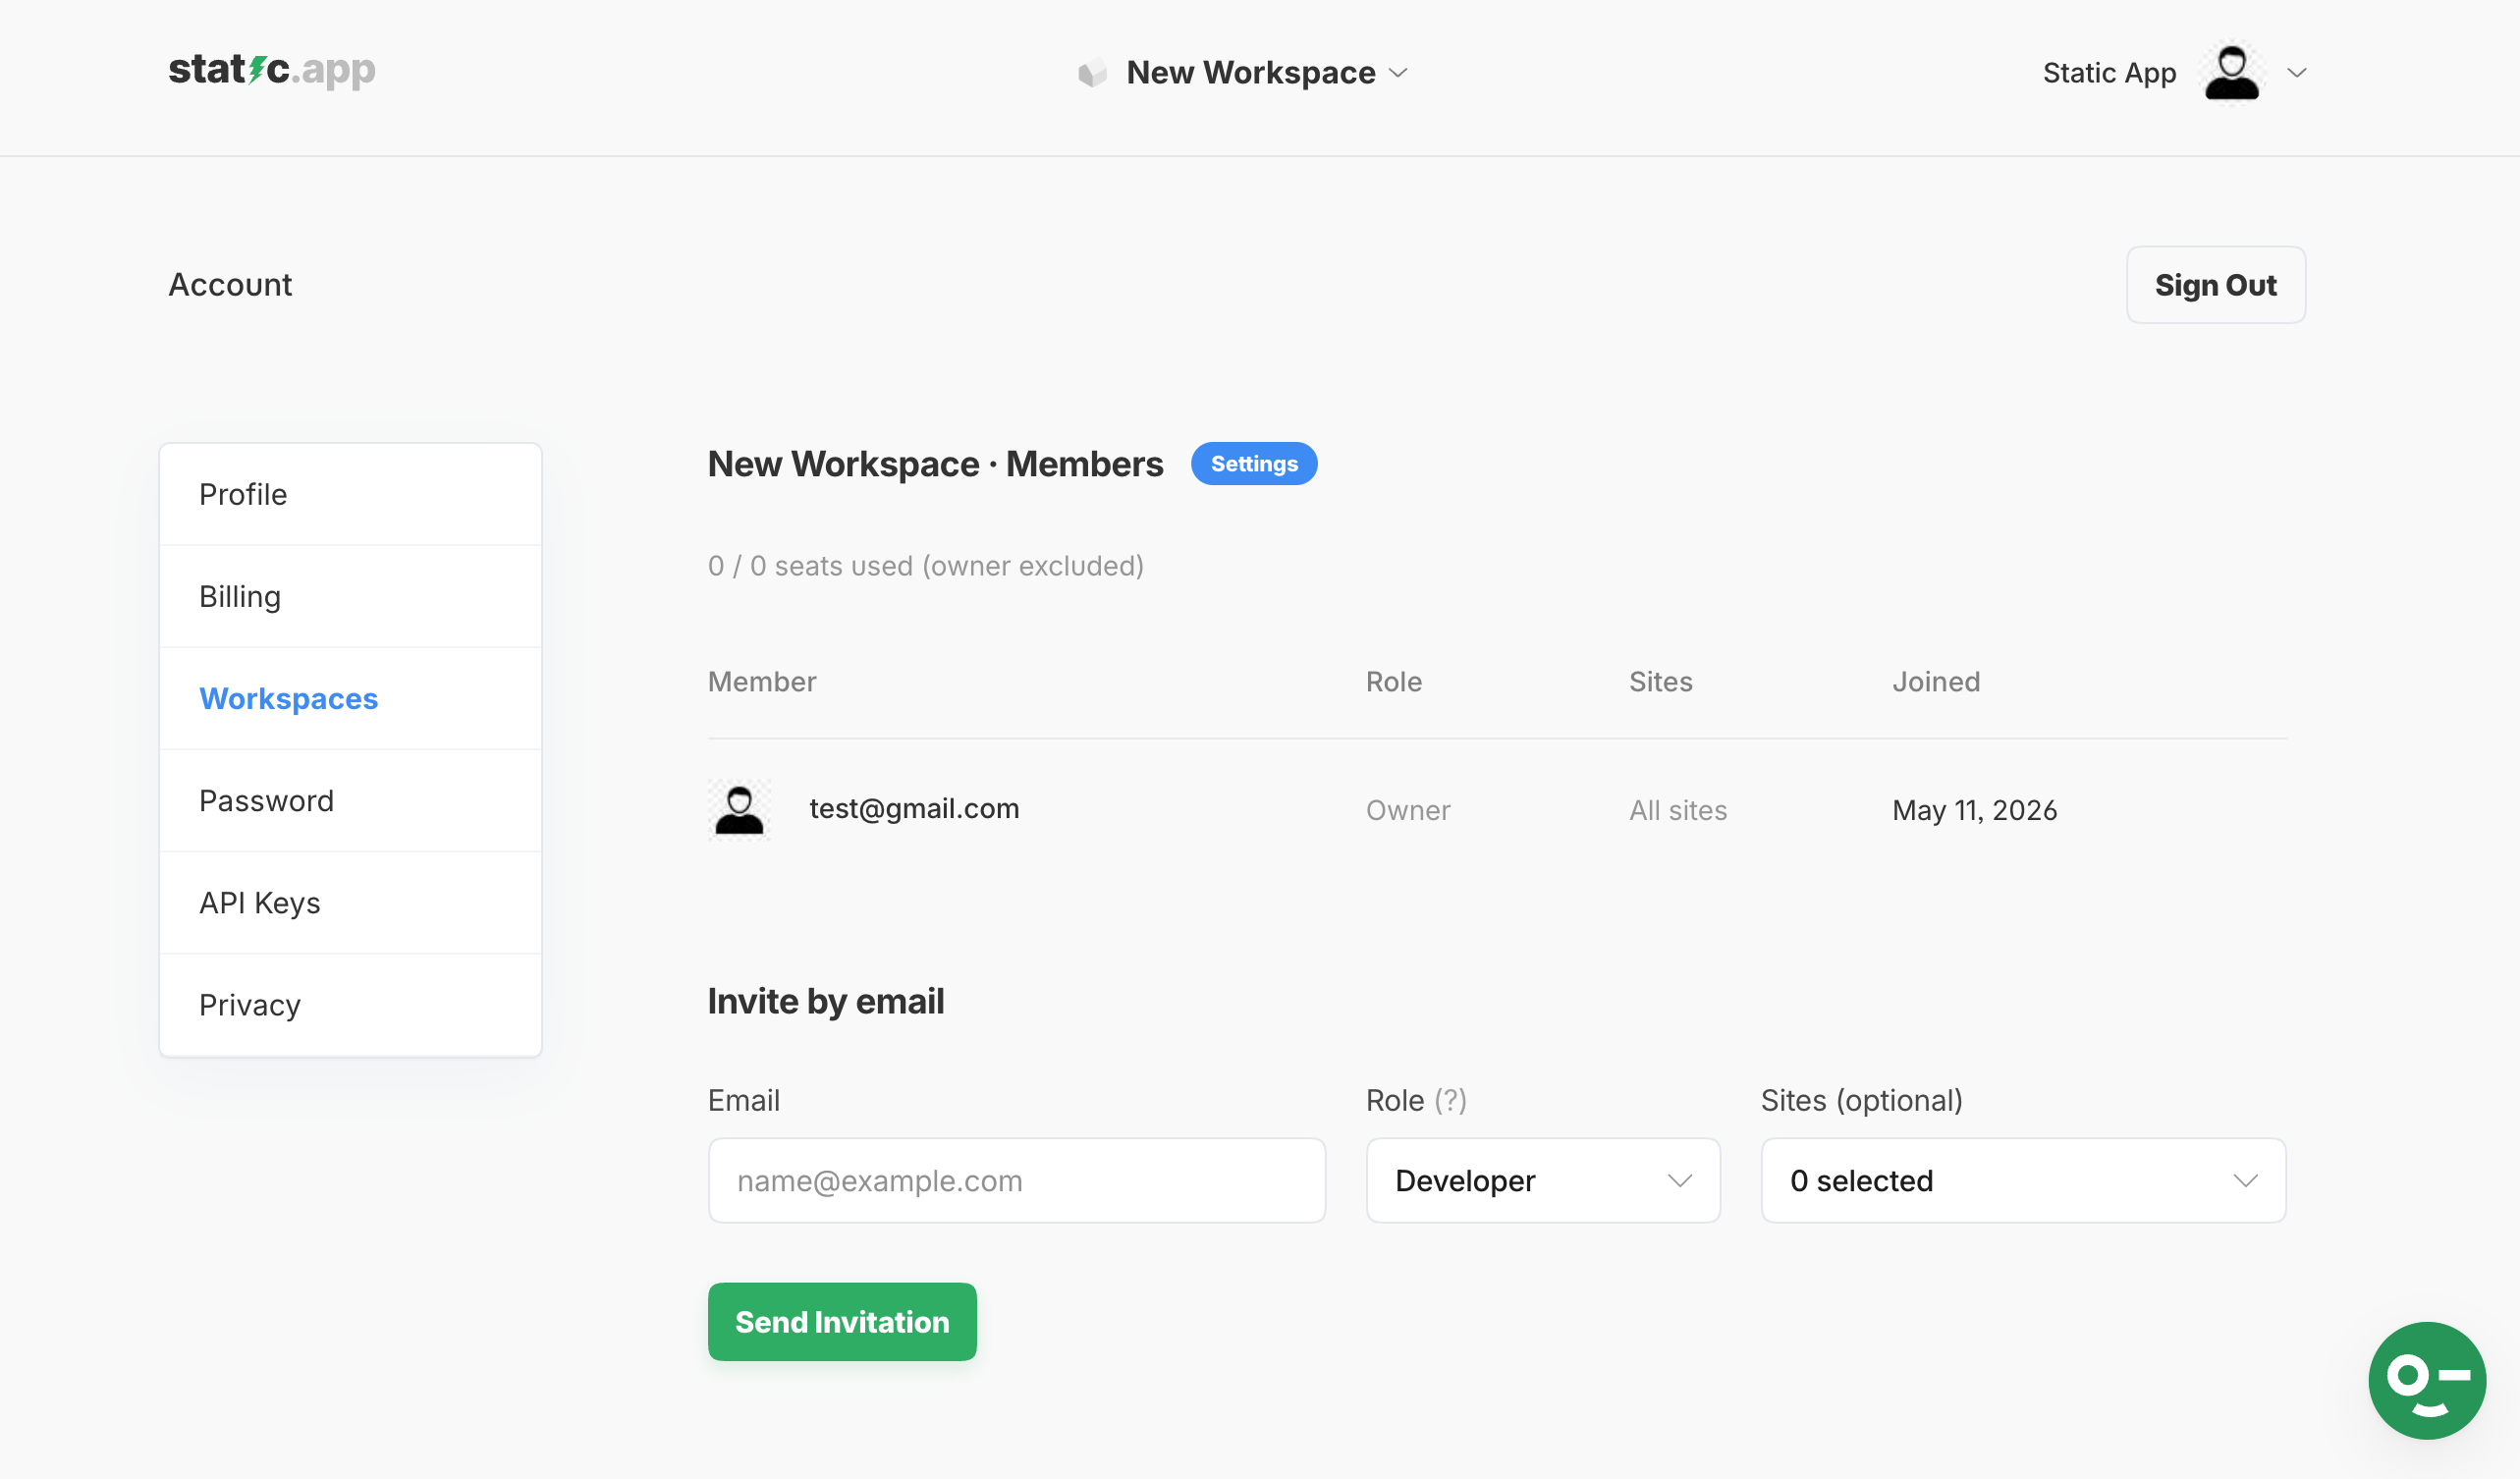
Once created, you will be automatically redirected to the Workspace - Members page. Here, you can view a list of all current members, their assigned roles, the sites they have access to, and the date they joined. You can also start adding collaborators right away using the "Invite by email" feature.
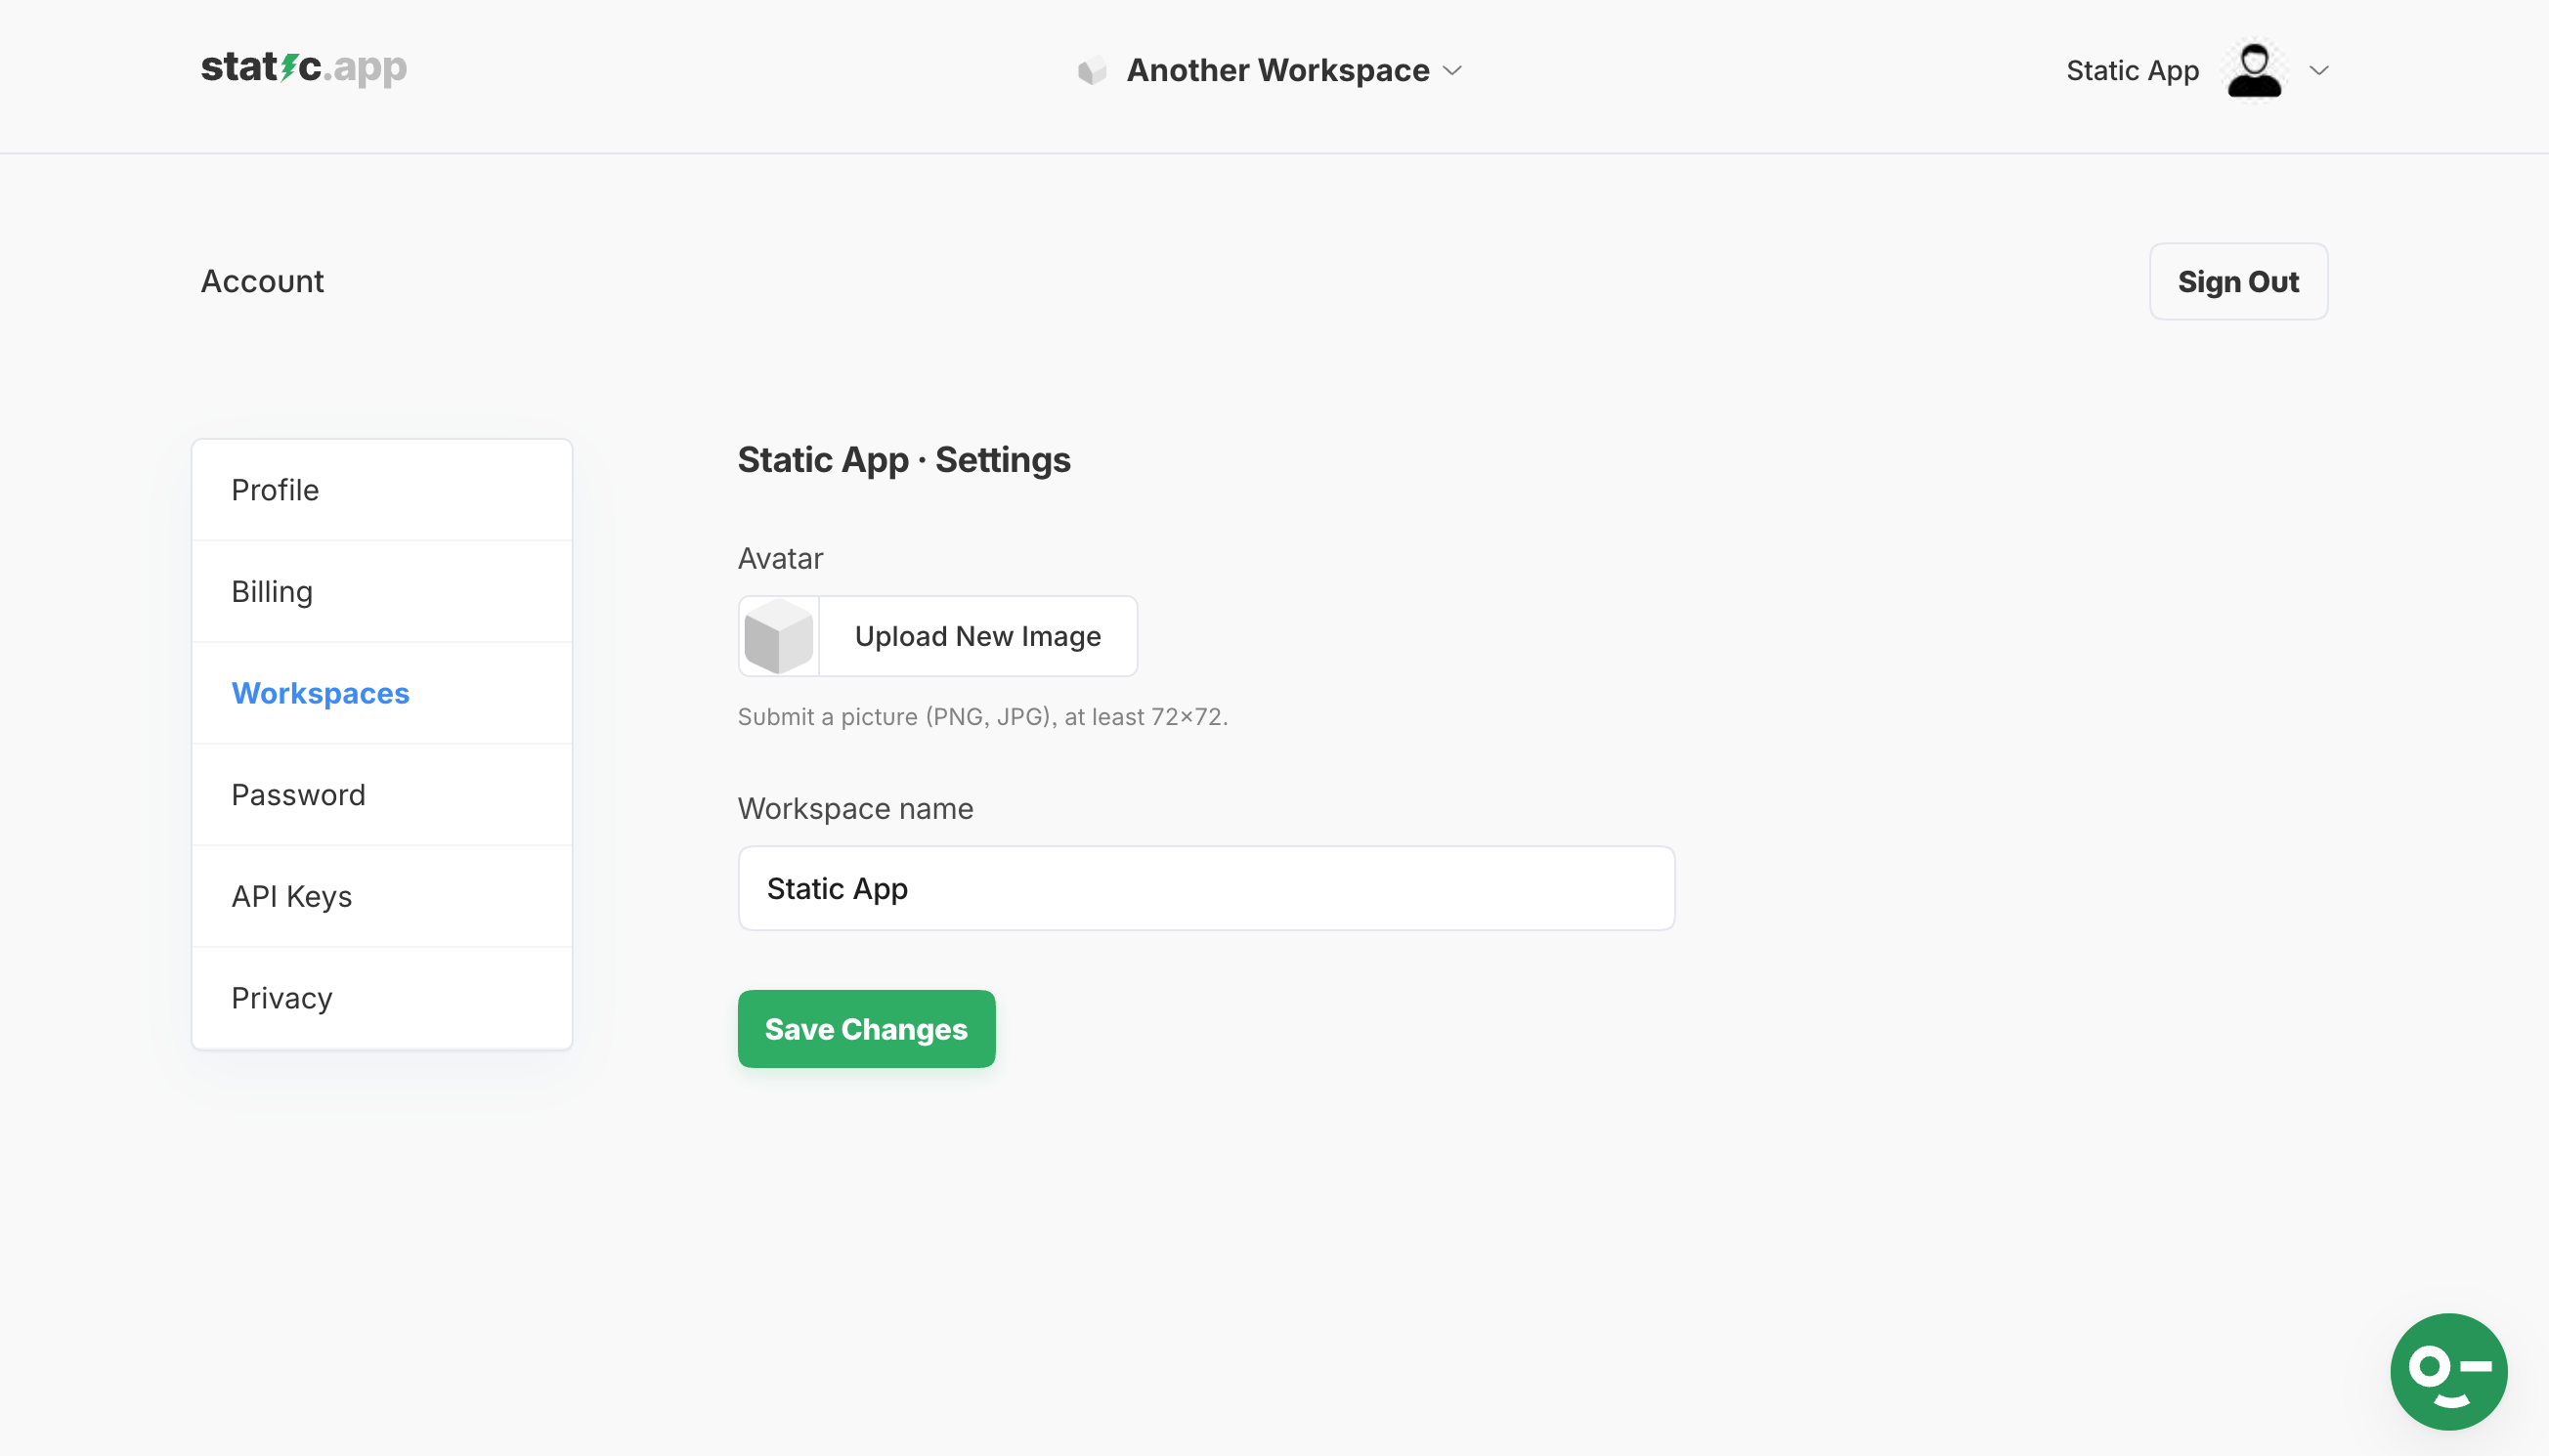
Workspace Settings
To customize your new workspace's profile:
-
In the Workspace - Members page, click on the Settings button right next to the "Workspace - Members" title.
Here, you can configure the following settings:
- Avatar: Click the Upload New Image button to submit a picture (PNG or JPG format, at least 72x72 pixels).
- Workspace name: Update the display name of your workspace.
- Click Save Changes to apply your updates.
For a detailed guide on how to add members and configure their permissions, please refer to Managing Teams and Roles.
Keep in mind that each workspace operates independently with its own subscription tier and seat limits. To understand how billing works across different environments, review Workspace Plans and Membership.