
Using Webhooks in Forms
The Webhooks integration in Static.app allows you to send real-time data from your forms to any external service or custom backend. Whenever a visitor submits a form on your website, Static.app can automatically trigger an HTTPS POST request to a URL of your choice, carrying the submission details in a JSON payload.
This is perfect for developers who want to process data in their own databases, trigger custom workflows in tools like Zapier or Make, or send notifications to internal Slack channels.
How to Access and Set Up Webhooks
Step 1: Access Webhooks
- Log in to your Static.app account.
- Navigate to the Forms section of your website and follow the guide to add a new form if you haven't set one up yet.
- Open the Apps section from your website's dashboard menu.
- Choose Webhooks.

Step 2: Prepare Your Endpoint
Before adding the webhook in Static.app, you need a destination URL that is ready to receive data.
- Endpoint Requirements: Set up an HTTPS URL that accepts POST requests with a JSON body.
- Data Sent: On every new form entry, Static.app sends:
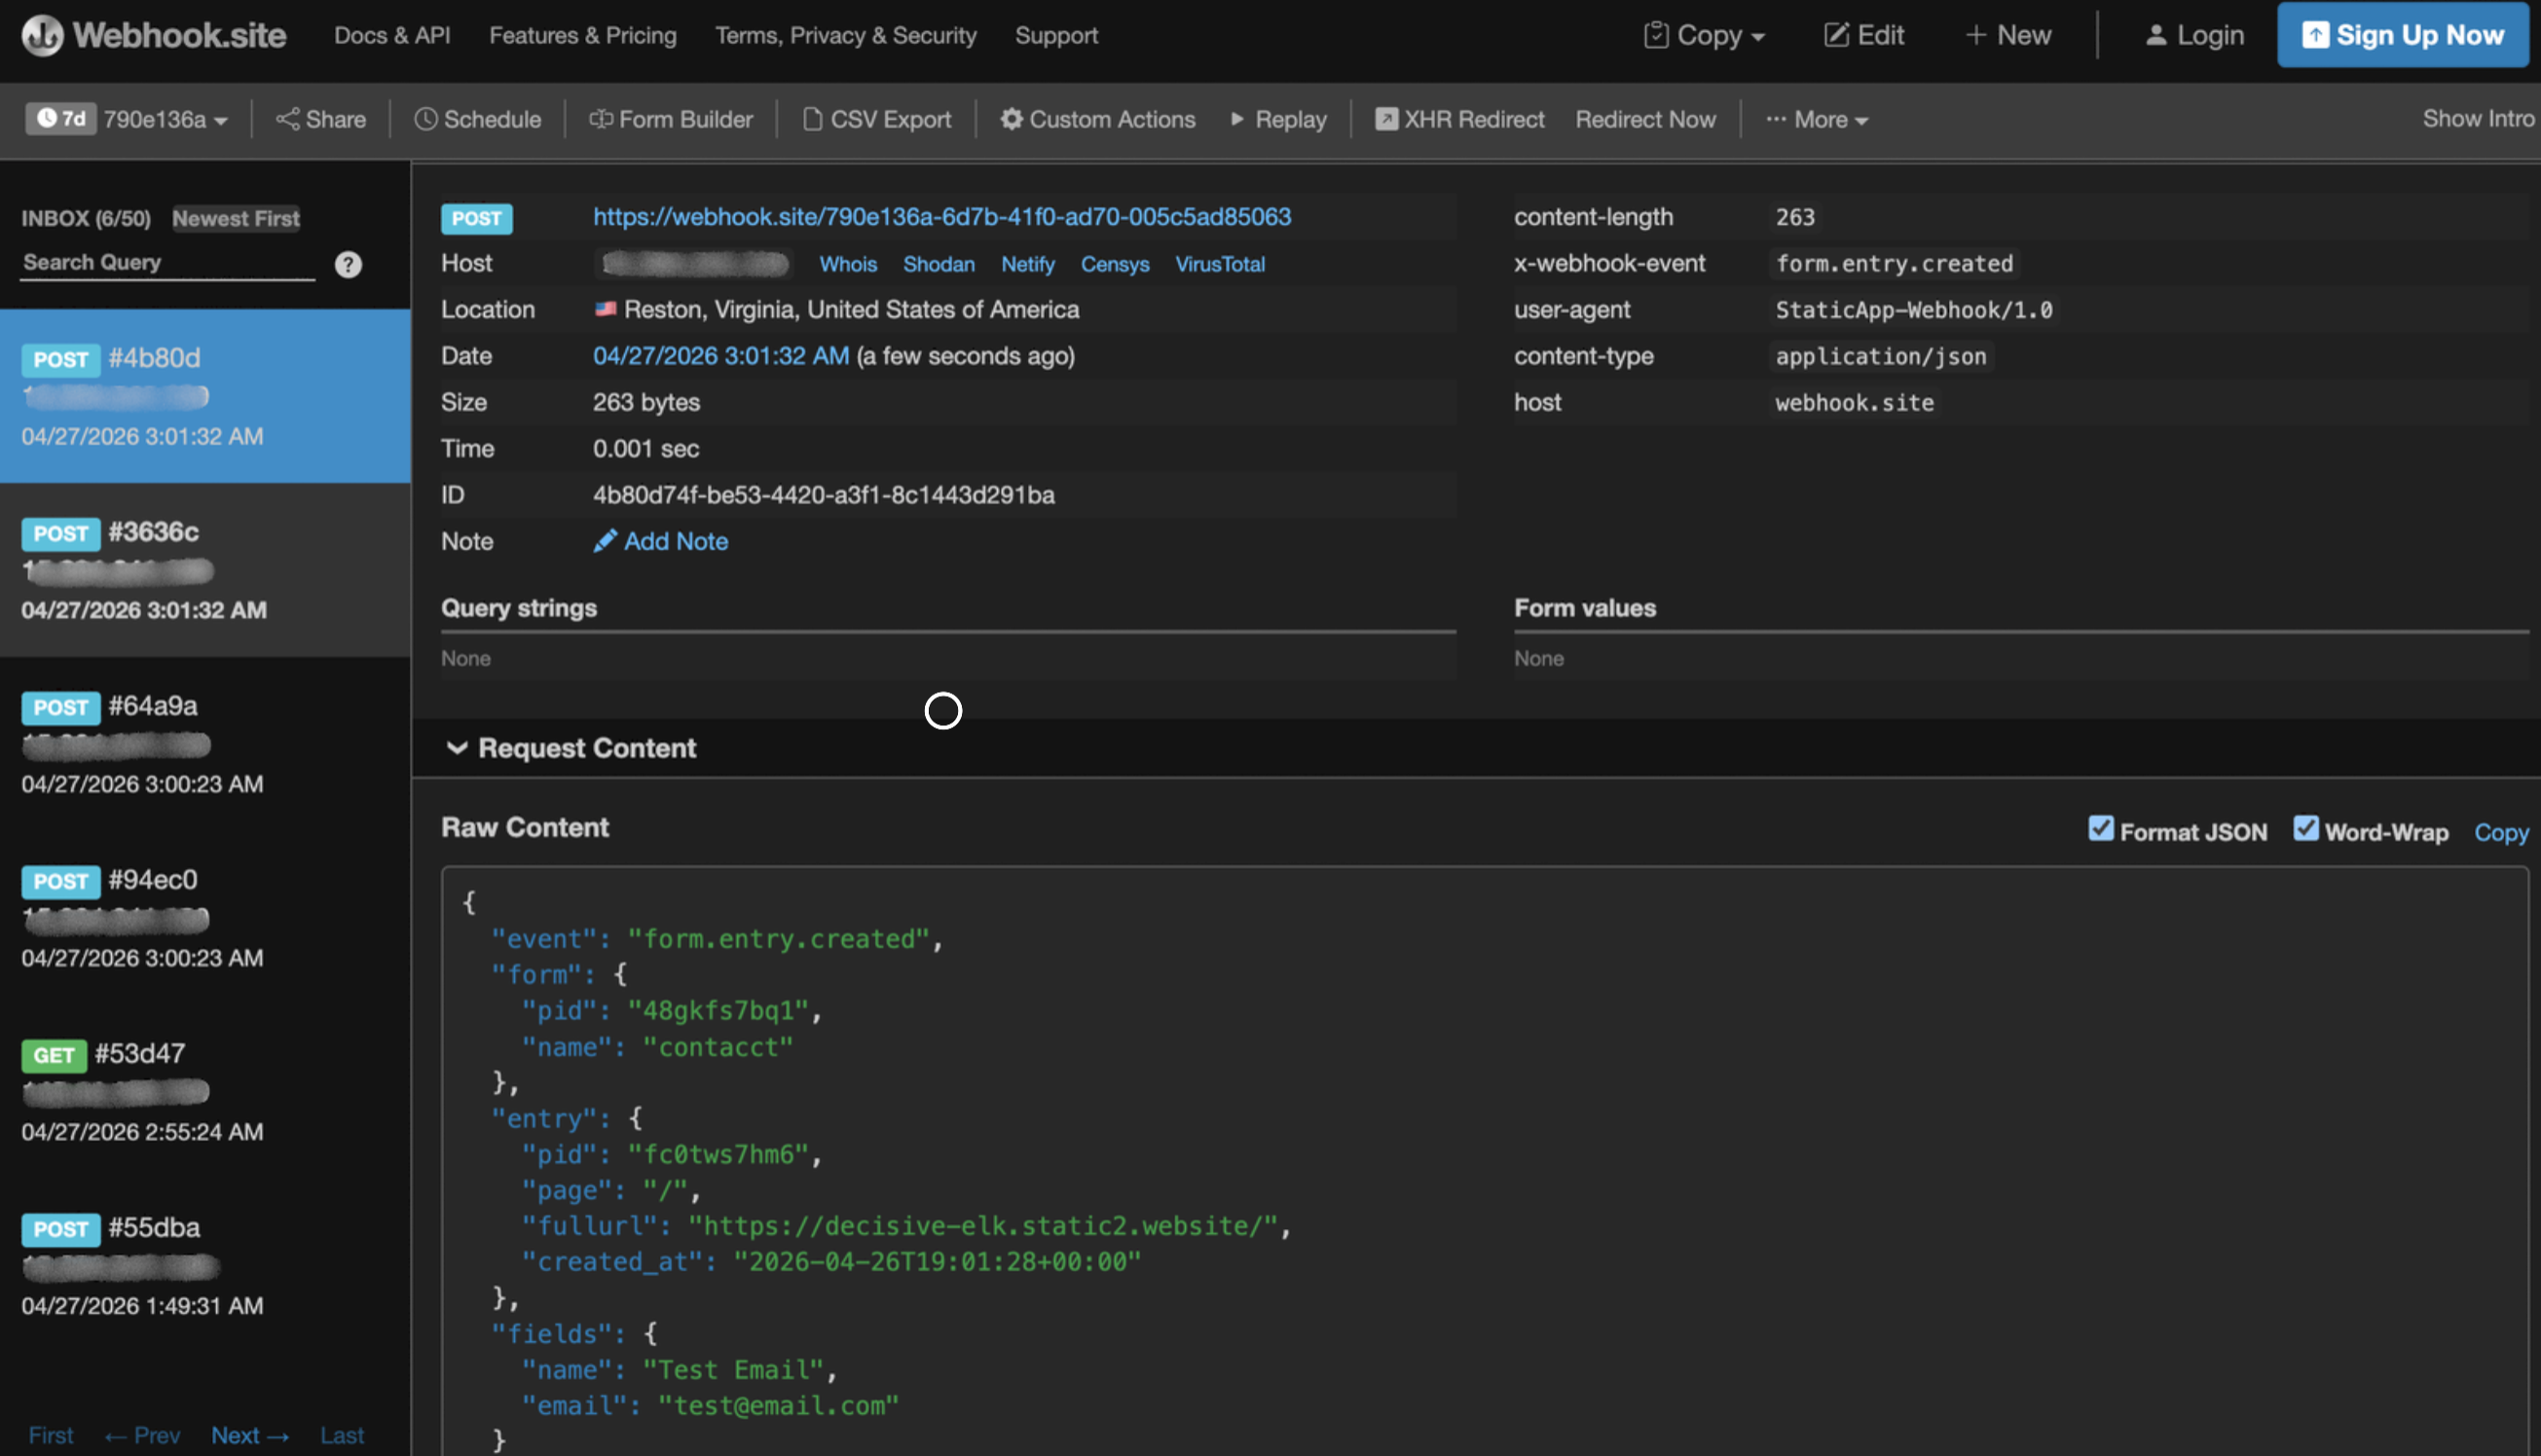
event,form,entry, andfields. - Testing Option: If you don't have a backend ready, you can use Webhook.site to generate a unique URL for testing.
Example Payload: Below is an example of the JSON data your endpoint will receive:
{
  "event": "form.entry.created",
  "form": {
    "name": "contact_form",
    "pid": "vknet0ubaf"
  },
  "entry": {
    "pid": "rf7ix8kecd",
    "page": "/",
    "fullurl": "[https://yourwebsite.com/](https://yourwebsite.com/)",
    "created_at": "2026-04-21T14:38:07+00:00"
  },
  "fields": {
    "name": "John Doe",
    "email": "john@example.com",
    "message": "Hello from the webhook!"
  }
}
Step 3: Configure the Webhook in Static.app
Now that you are in the Webhooks section and your endpoint is ready:
- Click the Add Webhook button.
- Give your webhook a descriptive name (e.g., "Slack Notification").
- Enter the HTTPS URL of your prepared endpoint (or your unique Webhook.site URL).
- Choose which specific form should trigger this webhook.
- For added security, you can provide a secret key to sign the request.

Step 4: Verify and Test Submissions
- Go to your live website and submit the selected form.
-
Using Webhook.site:
If you used a testing URL, keep the Webhook.site page open in a separate tab. It will automatically refresh to show the incoming POST request, allowing you to inspect the JSON payload and headers.
-
Using Your Own Endpoint:
Check your server logs or database to confirm the data was received and processed correctly.
-
- If you set a secret, verify the request authenticity by checking the
X-Webhook-Signature: sha256=<hex>header.

Why Use Webhooks?
While our Airtable integration is great for simple spreadsheets, Webhooks offer unlimited flexibility:
- Custom Backends: Store data in your own SQL or NoSQL databases.
- Instant Notifications: Trigger SMS, Email, or Chat alerts immediately.
- Complex Logic: Pass data through custom scripts for validation or transformation before storage.